When I last used this bike everything was fine. It has however been standing for 3 years. I was aware that the battery had died and got a new one. I also modified the wiring connections to give a little more room when fitting it. However, I hadn't expected a complete failure to start. Preliminary investigation revealed that the fuel tap was totally blocked so I removed it, disassembled it and cleaned it out. It was blocked with a gummy black deposit that I couldn't identify. I suspect I have some rubber somewhere that can't tolerate ethanol fuels. I will change fuel tubing just in case. The fuel line does have an in line filter so I hadn't expected a problem with that but depressing the tickler led to fuel spurting out of the tickler button. The flow didn't stop so the float or valve was clearly stuck. No choice then but to remove the carb and clean it.
To be honest I can't recall if I have ever dismantled this carb before but I suspect not. I removed the carb Undoing the two inlet spigot to manifold nuts and unscrewing the ring fitting so that the throttle slide could be removed intact and still attached to the throttle cable.
Surprisingly this was very tight at the end although it slides easily enough when in. I don't think this is right and suspect the carb is slightly deformed. However I don't want to change it and it did work fine so hopefully a clean will see it back in use.
This is an Amal type 32 carburettor and it's strip is well described in Haynes, however this was my experience. Firstly I removed the air filter gauze- which in my case seems to be held on by non standard screws
 |
| Air filter gauze- two non matching screws- I replaced these with 1/4" cheesehead BA4 screws for the rebuild. |
 |
| air filter removed |
I could then unscrew the three screws retaining the float chamber; 2 from above and one below.
 |
| left hand float chamber screw |
 |
| ... right hand |
 |
| ... and the single screw beneath. |
Inresringly I found 3 Thackeray washers scattered randomly amongst these screws and I think these should be under the 3 float chamber screws. I will refit them there anyway. The float chamber was stuck firm through the gasket which does also suggest that I've not been here before as I don't usually use sealant. I separated the chamber by tapping it with a screwdriver handle until the seal gave up. Unfortunately the float, pivot pin and needle valve fell out when it separated so I wasn't able to confirm the float was stuck. I found a modern viton tipped needle and although there was some gummy black treacly stuff on the float chamber I didn't see anything that would have stuck the float. I shook it to make sure it wasn't punctured.
 |
| float chamber separated from carb top. Note treacly gunk in the bottom. The grooves for the float spindle are clear below the gasket but the spindle itself fell out when I separated the halves. |
 |
| Float and spindle- check for liquid inside by shaking |
However, the needle seemed very small and rather thin for the orifice in which it works.
 |
| Float needle- viton tipped. |
I stripped the plug from the float bowl (1/4 WW). The jet beneath was well caked in black gunk and I didn't realise it even had a screwdriver slot for removal until I'd cleared that away. I removed the pilot jet and found it totally blocked. I cleared it with a guitar stribg {top E} and blasted the gunk out with carb cleaner.
 |
| Float chamber base plug- covers pilot jet |
 |
| Below the plug the opening was thick with gunk. I couldn't even see the jet below had screwdriver flats in it... |
 |
| ... until I had cleaned some of this muck out. |
 |
| The jet then screwed out easily. It was pretty dirty |
Turning attn to the carb top I removed the needle jet and main jets with a BA 4 and 6 spanners and cleaned them thoroughly.
 |
| Needle jet (upper) and main jet |
 |
| Using a BA6 spanner to remove needle jet using the flats on the shaft |
 |
| Needle jet removed. This was relatively clean and clear |
 |
| This leaves the main jet which is also a BA6 fitting |
 |
| |Main jet unscrewed- this was also completely blocked. |
Finally I removed the banjo inlet with its filter (this will need new fibre washers on the rebuild), the tickler device and mixture screw (11 turns). All had traces of black gunk but not so bad. I cleaned all as above and then blasted the carb body sections through with carb cleaner, checking that all the connections I could predict from the body mouldings did actually connect and pass fluid.
 |
| The fuel entry banjo (1/4WW) |
 |
| Removing the banjo and... |
 |
| ... extracting the gauze filter. |
 |
| Unscrewing the tickler assembly |
 |
| Tickler assembly removed- some dirt but not as bad as expected. |
 |
| Carb top - tickler socket needed cleaning |
 |
| Mixture screw to right of thumb |
When I was sure I refitted the tickler and placed all jets and the carb body sections in to a sonicating bath at 65 deg C. This cleaned everything up prior to reassembly. However whilst I was waiting for the new gaskets I chanced to inspect again the float needle valve- It looks far too small and I dont think it can be correct for this carb. I have no explanation for this; perhaps I lost the real needle when the carb sprang apart and assumed this old needle was from the carb? Who knows. In any event I have ordered a new float needle valve
 |
| The presumed float needle barely fills the needle valve body |
 |
| As above- it looks far too small! |
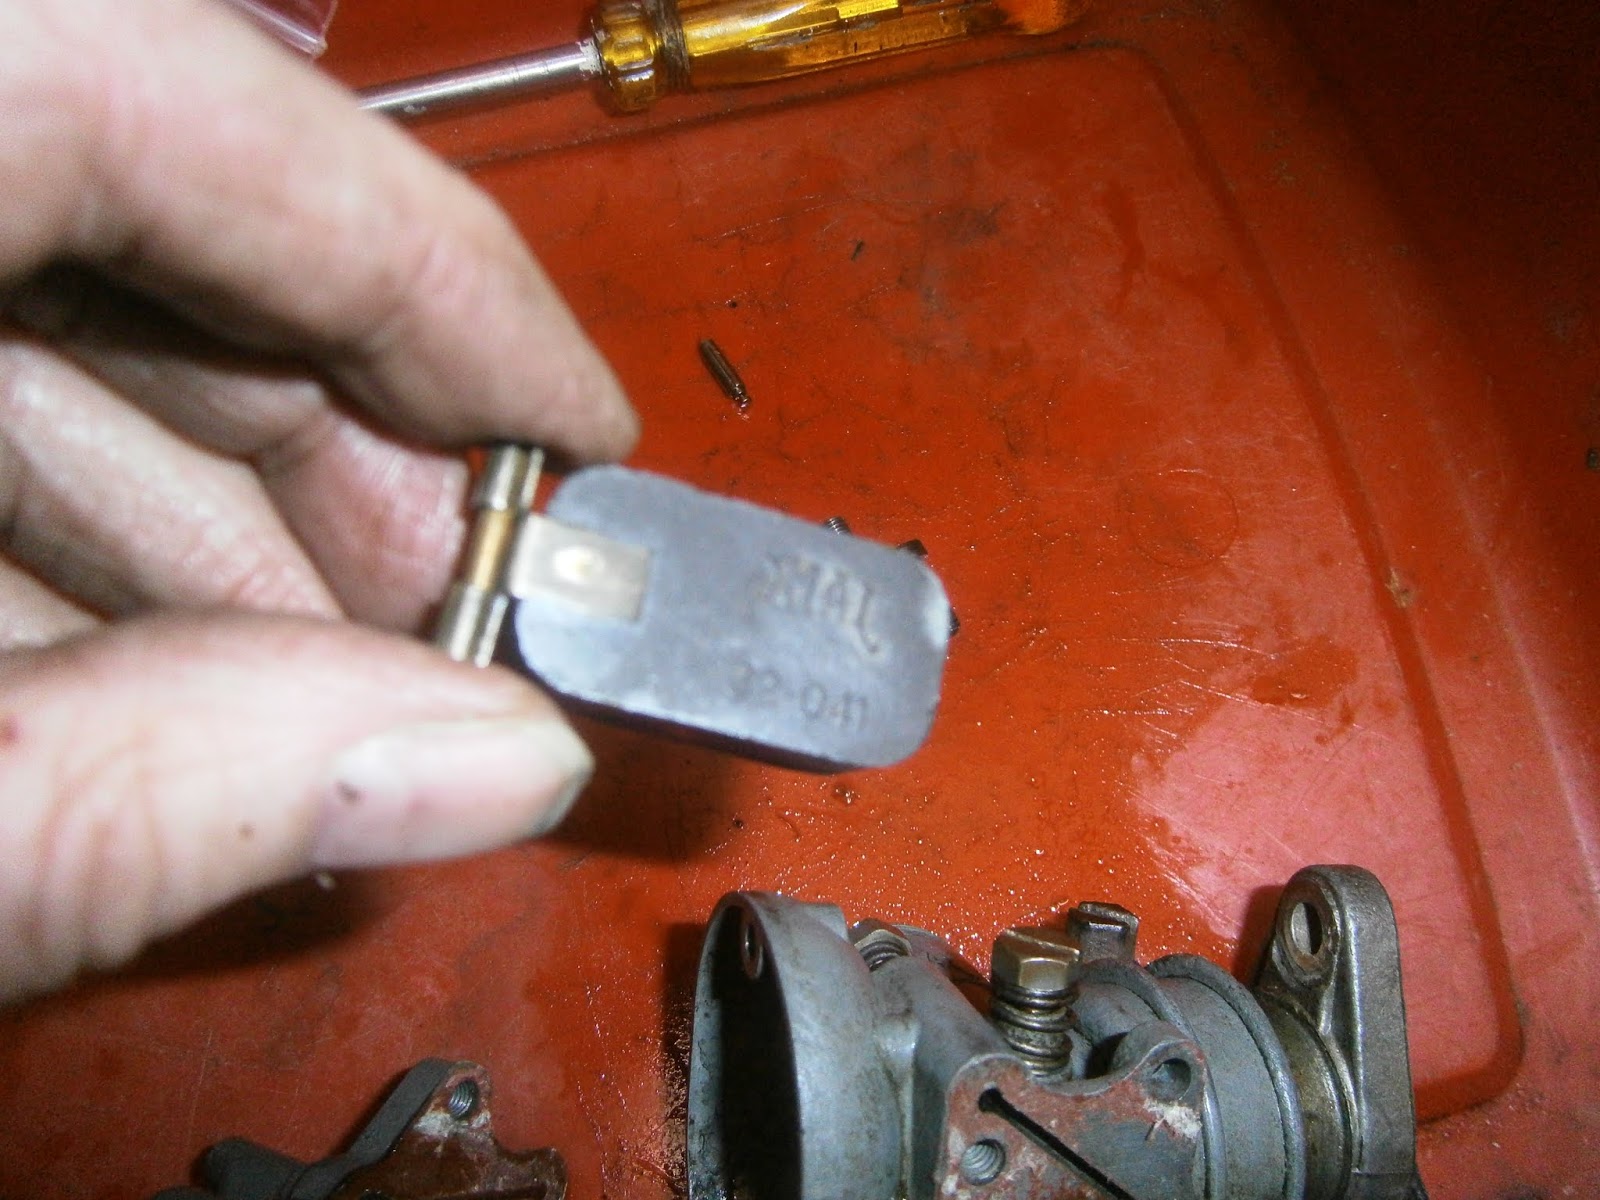
I was aware the the throttle slide doesn't fit that well into the carb body so I decided to remove the slide and clean it in the sonicator as well.
 |
| This is the slide assembled on the throttle cable |
You can compress the spring and fiddle the cable end out of the slide via the exit hole.
 |
| This is the slide removed, the choke air-slide remains attached to its cable |
Once removed the spring and needle can be withdrawn from the slider. I noticed that the needle clip appears to be installed wrongly and spans two grooves. This would tend to angle the needle and might account for the varnish deposition on one side. I suspect that this really means I need a new needle and a new needle jet but these are expensive so I'll try just cleaning and reassembling the thing first.
 |
| Throttle slide needle and spring as stripped |
 |
| The bridging of the clip over two needle groove is clear |
I repositioned the clip to a single groove, no 2 from the bottom
The slide itself was cleaned but still bound in the carb body. I located a tight spot by colouring the slide with blue felt tip before I reinserted it. I then polished the tight spot until fit was restored. I'm hoping this improves throttle action however it must also mean that there is potential for carburettor body wear and in the long run a new carb might be needed.
Reassembly is quite straight forward. I used new gaskets and fibre washers to rebuild. The new needle is a much chunkier affair and fits better in the float valve orifice.
Reassembled and ready to be reunited with the throttle slide and head.


No comments:
Post a Comment
Please feel free to make suggestions or improvements